Authentication with Ember and Firebase - A Newbie Friendly Guide (Part 2 of 2)
Goal: Connect authenticated session with Firebase user data
Time: 2 hours
Last Updated: 2nd December 2015
The Story So Far
In part 1 we created an authentication project using ‘ember-simple-auth’. Then we moved our authentication adapter to Torii to understand how to swap authentication adapters. In case you have not had a chance to work through the first part of this tutorial and want to start on this tutorial directly, simply download this starter code and use it as a starting point to follow along (make sure you add your own Firebase info in the config/environment.js file).
What We Will Be Building
Even though we’ve got some basic authentication setup, we still have not connected the session object with the Firebase data store. In this tutorial, we will do the following:
- Create a user model
- Create a user signup route and link the user to the session object
- Secure our Firebase store
But First We Will Improve Our UI
At present, on every page of our application, we have a login form showing up for all users that are not logged in. In order to make our test project look a little better, let’s create a separate login route and redirect visitors from our index page to that login page.
Generate a login route:
ember g route loginThen copy-paste the login related form fields and login action handler from your application template into your login template and route respectively.
So your revised application template (app/templates/application.hbs) will look like this:
<h2 id="title">Authentication Starter Project</h2>
{{#if session.isAuthenticated}}
   <button {{action 'logout'}}>Logout</button>
 {{/if}}
{{outlet}}
And your revised application route (app/routes/application.js) will look like this:
import Ember from 'ember';

export default Ember.Route.extend({
  actions: {
       logout: function() {
           this.get('session').close().then(function() {
               this.transitionTo('application');
           }.bind(this));
       }
   }
});
Your new login template (app/templates/login.hbs) will look like this:
<p>
  {{input type="text" value=userEmail placeholder="Email"}}<br>
  {{input type="password" value=userPassword placeholder="Password"}}<br>
  <button {{action "login"}}> Login </button>
</p>
And your new login route (app/routes/login.js) will look like this:
import Ember from 'ember';

export default Ember.Route.extend({
  actions: {
    login: function() {
      var controller = this.get('controller');
      var email = controller.get('userEmail');
      var password = controller.get('userPassword');
        this.get('session').open('firebase', {
             provider: 'password',
             email: email,
             password: password
        }).then(function() {
            this.transitionTo('protected');
        }.bind(this));
    }
  }
});
We will also need to create an index route like so:
ember g route indexand add some code to redirect a visitors to the home page to the login page like this:
  import Ember from 'ember';

  export default Ember.Route.extend({
  beforeModel: function(){
    this.transitionTo('login');
    }
  });
Now let’s begin our exercise.
Step 1: Create a User Model
To create a user, run the following in your command line:
ember g model userand add the following code in app/models/user.js
  import DS from 'ember-data';

  export default DS.Model.extend({
    firstName: DS.attr(),
    lastName: DS.attr()
  });
Step 2: Create a User Signup Route and Link the User to the Session Object
Next, let’s create a route called signup with this line in your terminal:
ember g route signupAnd create the signup form in signup.hbs (app/templates/signup.hbs):
Signup here: <br>

{{input type="text" value=firstName placeholder="First Name"}}<br>
{{input type="text" value=lastName placeholder="Last Name"}}<br>
{{input type="text" value=email placeholder="Email"}}<br>
{{input type="password" value=password placeholder="Password"}}<br>
<button {{action "signUp"}}> Sign Up </button>
Now let’s handle the signup action in our signup route (app/routes/signup.js). Remember to change your firebase URL in this code on line 12.
1
2
3
4
5
6
7
8
9
10
11
12
13
14
15
16
17
18
19
20
21
22
23
24
25
26
27
28
29
30
31
32
33
34
35
36
37
38
39
40
41
import Ember from 'ember';
import Firebase from 'firebase';

export default Ember.Route.extend({
actions: {
      signUp: function(){
        var controller = this.get('controller');
        var firstName = controller.get('firstName');
        var lastName = controller.get('lastName');
        var email = controller.get('email');
        var password = controller.get('password');
        var ref = new Firebase("https://YOUR-FIREBASE-NAME.firebaseio.com");
        var _this = this;

    ref.createUser({
        email    : email,
        password : password
      }, function(error, userData){
        if (error) {
          alert(error);
        } else {
          _this.get('session').open('firebase', {
            provider: 'password',
            'email': email,
            'password': password
          }).then(function(){
            var user = _this.store.createRecord('user', {
              id: userData.uid,
              firstName: firstName,
              lastName: lastName
            });
            user.save()
            .then(function(){
              _this.transitionTo('protected');
            });
          });
        }
      });
    }
  }
});
This code may need a little explanation:
- On line 2, we import the Firebase library.
- On line 12, we create a new instance of Firebase with our Firebase database.
- On line 15, we create a new user on the authentication part of Firebase.
- This returns a user object (userData).
- This user object has a uid property which is unique.
- We use this as the identifier when creating a new user.
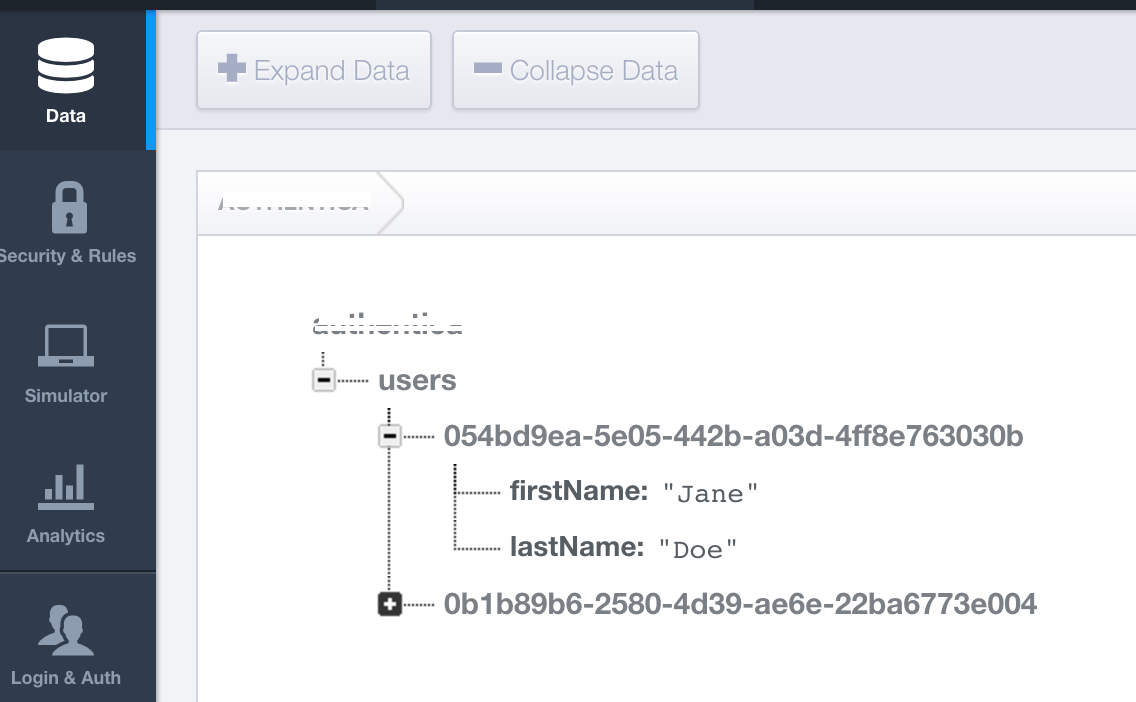
With all this wiring in place, you should be able to create a new user and see the user in your Firebase data store.
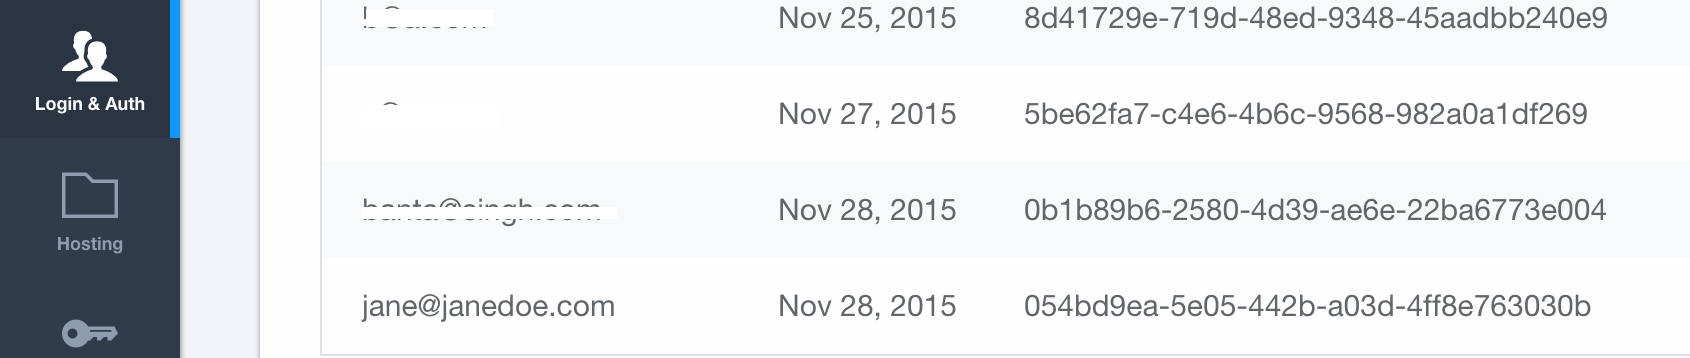
If you check under the Login & Auth tab, you will see the same User UID.
Back in your application, when a user is logged in, you will have a ‘currentUser’ object whose properties you can see by adding this line in your application template (‘application.hbs’):
<!-- your other code goes here -->
  {{log session.currentUser}}
Now, let’s move on to the last step of our project which is to secure our Firebase store.
Step 3: Secure Firebase Store
Firebase offers security rules which prevent unauthorized access of data.
We will create another small experiment to see how we can apply security to our Firebase.
First let’s create a new route called ‘private’:
ember g route privateThen, let’s update our private route in the router map (‘app/router.js’) to look like this:
//code above
this.route('private', { path: ':user_id' });
//code below
Then get the model from the URL in the ‘private’ route (app/routes/private.js) like this:
import Ember from 'ember';

export default Ember.Route.extend({
  model: function(params){
    return this.store.find('user', params.user_id);
  }
});
Next, in the private route, we will have a personalized message for the current user (‘app/templates/private.hbs’):
  <p>
   Hello {{model.lastName}}
  </p>
And we will give a link to this new private route in our ‘protected’ template (‘app/templates/protected.hbs’).
  <p>

  This is our protected content which can only be seen by logged in users.
  {{#link-to 'private' session.uid}} Go to your private page. {{/link-to}}

  </p>
For the next part, you will need to signup with multiple user id’s to see how it works. Login as a user and from the ‘protected’ page, navigate to the ‘private’ page. You will see that the current user’s last name is mentioned there. Now replace the URL at the top with another user’s id (you can get this from the user model in the Firebase data store).
You will see that the other users last name shows up. We don’t want that!
Why is this happening?
If you look under your ‘Security & Rules’ tab in your Firebase dashboard, you will see the following:
{
    "rules": {
        ".read": true,
        ".write": true
    }
}
Now let’s change the read-write rules for the user model with the following code:
{
    "rules": {
      "users": {
        "$user_id": {
          ".write": "auth.uid === $user_id",
          ".read": "auth.uid === $user_id"
        }
      }
  }
}
Now, if you login as a particular user and then try to access the private page with the URL of another user, you will see an error in your console and a user will not be able to access other users’ data.
Conclusion
As you can see, Firebase and Ember provide a wide range of options to handle authentication and secure user data. Thanks for working with these posts. Have fun with your Firebase and Ember adventures.
Oh … and do let me know if you can spot any errors or see areas for improvement.